after installing the vexim admin plugin, if i click on the link within round cube the page it goes to is blank. any reason why is this
Howto: My Vexim customizations
Last Updated on Saturday, 05 December 2009 19:42 Written by Axel Sjøstedt
Found my work useful?Please consider donating! :)
On my FreeBSD server, I use Exim as the Mail Transfer Agent, Vexim to deal with the virtual domains and account administration on an Apache webserver, courier-imap for POP and IMAP, SpamAsassin and ClamAV for filtering, and Roundcube for webmail. Exim (the "backend") is still actively developed, but the past few years Vexim (the frontend") hasn't been updated. Anyhow I still feel that this combo makes an effective mail solution, and I have no current plans of changing the setup. This page concerns the latest Vexim version at the time of writing, version 2.21.
I have made some enhancements to Vexim over the past years, and I'm sharing them with you on this page:
- Disable saving of passwords in clear text
- Tag spam in subject, not only in headers
- SMTP, POP and IMAP over SSL (multiple certificates/hosts)
- Option to automatically move spam to subfolders
- A shell script that deletes old mail in these autospam folders, and also parses mail in LearnAsSpam and LearnAsHam folders in SpamAssassin
- A Roundcube plugin that allows the users to edit their Vexim settings directly from the webmail settings page
This howto requires a working Vexim setup, preferabely with Courier-IMAP, although most can be achieved with slight changes if you use another POP/IMAP handler together with Exim. I consider also writing a howto for the whole process of installing the system with the tweaks on this page included.
All feedback/questions/comments is appreciated, feel free to drop me an e-mail at This e-mail address is being protected from spambots. You need JavaScript enabled to view it . Or even better, as your input can be valuable for others as well, post a comment at the bottom of this page.
1. Disable saving of passwords in clear text
By default, the password in clear text is saved in the MySQL clear field, and a crypted version in the crypt field. Even if your server is secured properly, it is not a good thing to have lots of clear text passwords laying around in a database that needs to be accessed by the user running the web server. Both Exim and Courier can authenticate against crypted passwords, so the clear text password is not really neccessary. The biggest issue you should have in mind is that it can make migration to other systems more difficuelt in the future, especially to systems with different crypt() implementations.
- Update your exim configuration (/usr/local/etc/exim/configure). At the bottom of the file, your authenticators section should look like this:
begin authenticators

plain_login:
      driver = plaintext
      public_name = PLAIN
      server_condition = "${if crypteq{$3}{${lookup mysql{ \
                          SELECT crypt FROM users \
                          WHERE username = '${quote_mysql:$2}' \
                          }}}{yes}{no}}"
      server_set_id = $2

 fixed_login:
      driver = plaintext
      public_name = LOGIN
      server_prompts = "Username:: : Password::"
      server_condition = "${if crypteq{$2}{${lookup mysql{ \
                          SELECT crypt FROM users \
                          WHERE username = '${quote_mysql:$1}' \
                          }}}{yes}{no}}"
      server_set_id = $1
Support from cram-md5 authentication was not an issue for me, as I prefer to have the whole session encrypted via SSL anyways. - Now restart the Exim daemon:
/usr/local/etc/rc.d/exim restart
- Your IMAP/POP MTA should also use the crypt authentication field. If you have followed the INSTALL document in the Vexim package, and the instructions for integrating with Courier-IMAP on the Vexim page, you Courier is already properly set up for this. If you want to double-check, open the Courier-authlib MySQL authentication file (/usr/local/etc/authlib/authmysqlrc) and make sure that the fields MYSQL_CLEAR_PWFIELD is commented out, and MYSQL_CRYPT_PWFIELD is set to database field "crypt":
MYSQL_CRYPT_PWFIELD     crypt
#MYSQL_CLEAR_PWFIELD     clear
- If you changed the configuration, restart the Courier authdaemon:
/usr/local/etc/rc.d/courier-authdaemond restart
- At this point your system never need the clear text field for authentication. Now we need to edit the Vexim PHP files to avoid passwords being written to the database in clear text. You can either:
- Download a compressed file with all the affected files (last uptdated 2009-09-25), and put these files in your Vexim folder. Note that these new files also include the move-spam function from chapter 4 and a note about to the parse cript in chapter 5. Thus you need to follow at least chapter 4 and 6 as well to get a working Vexim with this zip-file.
- If you have done your own Vexim tweaks that you don't want to override, or you just need more control of the process, you can do the required changes manually instead
- Now we have made sure that Vexim doesn't save passwords in clear text anymore, but we have to get rid of all old clear text passwords currently saved in the database. We do that by making the clear field a copy of the crypt field. You will need access to the Vexim database, for example by opening a MySQL command prompt:
mysql -p -u vexim -D vexim
Issue this SQL command:
UPDATE `users` SET `clear` = `crypt`;
- Done!
2. Tag spam in subject, not only in header
By default, spam is only tagged in the X-Spam headers. Since users cannot tweak their own spam settings more than setting the score thresholds, and subject tagging still seems to be popular to identify spam and make client side filters, I added automatic tagging of "****SPAM*****" and spam score in subject. Here is how you do it:
- We can only add, not remove headers at ACL time. Therefore we will first add a X-New-Subject header. Add the text in green to the bottom of /usr/local/etc/exim/vexim-acl-check-content.conf:
warn message = X-Spam-Report: $spam_report spam = nobody:true warn message = X-New-Subject: ******SPAM****** ($spam_score) $h_subject: spam = nobody accept hosts = 127.0.0.1:+relay_from_hosts - Then, we make a perl script /usr/local/etc/exim/rewrite_subject.pl that is used to switch this header to the real subject header:
#!/usr/bin/perl use Mail::Internet; $mail = new Mail::Internet \*STDIN, Modify => 0; $header = $mail->head(); $subject = $header->get('X-New-Subject'); if ($subject ne "") { $header->replace('Subject', $subject); } $mail->print(); - Note that you need the Mail::Internet module supplied with MailTools for the perl script to work. Now make the script executeable:
chmod 755 /usr/local/etc/exim/rewrite_subject.pl
- And finally, we instruct Exim to run this perl script on spam mail. On line 757 in your Exim configuration /usr/local/etc/exim/configuration, you will find the virtual_delivery transport. Add the lines in green:
virtual_delivery: driver = appendfile envelope_to_add return_path_add mode = 0600 maildir_format = true create_directory = true transport_filter = '${if or { {eq {0}{${lookup mysql{select on_spamassassin from users,domains \ where localpart = "${quote_mysql:$local_part}" \ and domain = "${quote_mysql:$domain}" \ and users.domain_id=domains.domain_id}{$value}}}} \ {< {$spam_score_int}{${lookup mysql{select users.sa_tag * 10 from users,domains \ where localpart = "${quote_mysql:$local_part}" \ and domain = "${quote_mysql:$domain}" \ and users.domain_id=domains.domain_id \ and on_spamassassin = 1}{$value}}}} \ } {/bin/cat}{/usr/local/etc/exim/rewrite_subject.pl}}' directory = ${lookup mysql{select smtp from users,domains \ where localpart = '${quote_mysql:$local_part}' \ and domain = '${quote_mysql:$domain}' \ and users.domain_id = domains.domain_id}} - Restart Exim to apply the changes:
/usr/local/etc/rc.d/exim restart
3. SMTP, POP and IMAP over SSL (multiple certificates/hosts)
The mail infrastructure and standards (speaking of POP and SMTP) are much like how they were when Internet was a unknown phenomen several decades ago. But today, most modern mail clients at least support running the old mail protocols over a secured SSL connection. This will not make transferring of mail between the server and other servers secure, but it will make sure the user's password is not sent on an unsecure connection, and all traffic to/from the user and client will be encrypted. You can configure Apache (webmail), Exim (SMTP) and Courier-IMAP (POP and IMAP) to use the same certificates, and this is briefly covered in this chapter. I struggled to make Exim work with SSL, but after finding the perfect combo of configuration variables, it works perfectly.
All these systems support the use of several certificates on one server. Due to the nature of the regular SSL system, each certificate is tied to an uniquie IP address, so you will need several IP addressees on your server to make this working. The steps in the howto makes you able to use several certificates/host names, but you can follow them to only have one host.
- Generate the SSL certificates for your server. This howto does not cover the process of generating and signing SSL certificates, but there are lots of info on how to achieve this laying around the web..
- You are probably starting with one crt file and one key file per host. You will need to make some copies of this files and restrict read access to them as the list below illustrates. We use 192.168.0.50 as the example IP address of the host. You should change this to your host IP address, and if needed do the same with the other IP's, you of you have several SSL host names:
- /usr/local/certificates/192.168.0.50/server.crt (readable by user running Exim: proabably mailnull)
- /usr/local/certificates/192.168.0.50/server.key (readable by user running Exim: proabably mailnull)
- /usr/local/certificates/courier-imap.key-crt.192.168.0.50 (readable by user running Courier-IMAP: proabably mailnull)
- Update your exim configuration (/usr/local/etc/exim/configure). In the main configuration, add the text in green:
daemon_smtp_ports = smtp : smtps # SSL/TLS config tls_advertise_hosts = * # additionally listen on ssl/smtp tls_on_connect_ports = 465 tls_certificate = /usr/local/certificates/$interface_address/server.crt tls_privatekey = /usr/local/certificates/$interface_address/server.key # We also want a little more detail in our logs, helps with debugging log_selector = +tls_cipher +tls_peerdn VIRTUAL_DOMAINS = SELECT DISTINCT domain FROM domains WHERE type = 'local' AND enabled = '1' AND domain = '${quote_mysql:$domain}' RELAY_DOMAINS = SELECT DISTINCT domain FROM domains WHERE type = 'relay' AND domain = '${quote_mysql:$domain}' ALIAS_DOMAINS = SELECT DISTINCT alias FROM domainalias WHERE alias = '${quote_mysql:$domain}' - Update your Courier-IMAP settings. If /usr/local/etc/courier-imap/imapd-ssl, make it from a copy of /usr/local/etc/courier-imap/imapd-ssl.dist. Now edit the file, and change this line:
TLS_CERTFILE=/usr/local/certificates/courier-imap.key-crt
Courier-IMAP will add a dot and the IP address to the filename, and match the file courier-imap.key-crt.192.168.0.5 we made previously. - Repeat the previous step with file /usr/local/etc/courier-imap/pop3d-ssl as well to enable SSL over POP.
- Remember to enable the Courier-IMAP SSL functionality by adding the following lines to /etc/rc.conf:
courier_imap_imapd_ssl_enable="YES"
courier_imap_pop3d_ssl_enable="YES"
- Configure the SSL host(s) in Apache. You will need to edit the host names and so on, but this Apache 2.2 configuration should be a good place to start. If you use Apache 2 or newer, your SSL configuration may reside in /usr/local/etc/apache22/extra/httpd-ssl.conf, which can look something like this:
# Note: The following four lines must must be present to support starting without SSL on platforms with no /dev/random equivalent but a statically compiled-in mod_ssl. <ifmodule> SSLRandomSeed startup builtin SSLRandomSeed connect builtin </ifmodule> Listen 443 AddType application/x-x509-ca-cert .crt AddType application/x-pkcs7-crl .crl SSLPassPhraseDialog builtin SSLSessionCache "shmcb:/var/run/ssl_scache(512000)" SSLSessionCacheTimeout 300 SSLMutex "file:/var/run/ssl_mutex" <VirtualHost 192.168.0.50:443> DocumentRoot /usr/local/www/apache22/data/mail.yourmailserver.com ServerName mail.yourmailserver.com ErrorLog mail.yourmailserver.com-error_log CustomLog mail.yourmailserver.com-access-log combined SSLEngine on SSLCipherSuite ALL:!ADH:!EXPORT56:RC4+RSA:+HIGH:+MEDIUM:+LOW:+SSLv2:+EXP:+eNULL SSLCertificateFile "/usr/local/certificates/192.168.0.50/server.crt" SSLCertificateKeyFile "/usr/local/certificates/192.168.0.50/server.key" <FilesMatch "\.(cgi|shtml|phtml|php)$"> SSLOptions +StdEnvVars </FilesMatch> <Directory "/usr/local/www/apache22/cgi-bin"> SSLOptions +StdEnvVars </Directory> BrowserMatch ".*MSIE.*" \ nokeepalive ssl-unclean-shutdown \ downgrade-1.0 force-response-1.0 Alias /admin "/usr/local/www/vexim/" Alias /webmail "/usr/local/www/roundcube/" <Directory /usr/local/www/apache22/data/mail.yourmailserver.com> <IfModule mod_rewrite.c> RewriteEngine On RewriteRule ^$ /webmail </IfModule> </Directory> <Directory "/usr/local/www/vexim/"> Options none AllowOverride Limit Order deny,allow Allow from all </Directory> <Directory "/usr/local/www/roundcube"> Options Indexes FollowSymLinks AllowOverride All Order allow,deny Allow from all </Directory> </VirtualHost> - Now the SSL host for webmail/vexim is set up. It will probably be a good idea to redirect all normal http requests to the https equalient. For example by adding this to /usr/local/etc/apache22/extra/httpd-vhosts.conf:
NameVirtualHost 192.168.0.50:80 <VirtualHost 192.168.0.50:80> ServerAlias mail.yourmailserver.com Redirect / https://mail.yourmailserver.com/ </Virtualhost> - Finally, remember that you need a working Apache main configuration file (/usr/local/etc/apache22/httpd.conf. Especially remember to include the two files we have just edited at the bottom of the main config:
Include etc/apache22/extra/httpd-vhosts.conf
Include etc/apache22/extra/httpd-ssl.conf
- Now we have configured Exim, Courier and Apache for SSL, and you should restart the affected daemons:
/usr/local/etc/rc.d/exim restart
/usr/local/etc/rc.d/courier-imap-imapd-ssl restart
/usr/local/etc/rc.d/courier-imap-pop3d-ssl restart
apachectl restart
- Your mail server should be behind a conservatively configured firewall. In that case, remember to open/redirect ports 465, 995 and 993.
4. Option to automatically move spam to subfolders
Since there is no support to administer server side filtering with Vexim, except for the limited header blocking, I added a feature that can automatically move spam from the inbox to subfolders. It is very convenient for IMAP users, especially those who use their mobile phone for reading mail and is irritated by both the traffic and precious screen space being occupied by spam.
- We need a field in the Vexim database to keep the user settings. Open the database for access, for example by opening a MySQL prompt:
mysql -p -u vexim -D vexim
Issue this MySQL command on the database:
ALTER TABLE users` ADD `axel_on_movespam` TINYINT( 1 ) NOT NULL DEFAULT '0';
- Add these two routers just before the virtual_domains router in your Exim configuration (/usr/local/etc/exim/configure):
axel_move_spam_to_folder_lowscore:
  driver = redirect
  allow_fail
  file_transport = axel_move_folder_transport
  data = ${lookup mysql{select concat(smtp,'/.Filter-Spam-Low') \
              from users,domains \
              where localpart = '${quote_mysql:$local_part}' \
              and domain = '${quote_mysql:$domain}' \
              and domains.enabled = '1' \
              and users.enabled = '1' \
              and users.domain_id = domains.domain_id}}
  condition = ${if and \
                        { \
                                {<{$spam_score_int}{90}} \
                                {> \
                                        {$spam_score_int} \
                                        {${lookup mysql{select users.sa_tag * 10 from users,domains \
                                        where localpart = '${quote_mysql:$local_part}' \
                                        and domain = '${quote_mysql:$domain}' \
                                        and users.on_spamassassin = '1' \
                                        and users.on_forward = '0' \
                                        and users.axel_on_movespam = '1' \
                                        and users.axel_on_filtermove != '1' \
                                        and users.type = 'local' \
                                        and users.domain_id=domains.domain_id }{$value}fail}} \
                                } \
                        } \
                 {yes}{no} \
               }
  local_part_suffix = -*
  local_part_suffix_optional
  retry_use_local_part

axel_move_spam_to_folder_highscore:
  driver = redirect
  allow_fail
  file_transport = axel_move_folder_transport
  data = ${lookup mysql{select concat(smtp,'/.Filter-Spam-High') \
              from users,domains \
              where localpart = '${quote_mysql:$local_part}' \
              and domain = '${quote_mysql:$domain}' \
              and domains.enabled = '1' \
              and users.enabled = '1' \
              and users.domain_id = domains.domain_id}}
  condition = ${if and \
                        { \
                                {>{$spam_score_int}{89}} \
                                {> \
                                        {$spam_score_int} \
                                        {${lookup mysql{select users.sa_tag * 10 from users,domains \
                                        where localpart = '${quote_mysql:$local_part}' \
                                        and domain = '${quote_mysql:$domain}' \
                                        and users.on_spamassassin = '1' \
                                        and users.on_forward = '0' \
                                        and users.axel_on_movespam = '1' \
                                        and users.axel_on_filtermove != '1' \
                                        and users.type = 'local' \
                                        and users.domain_id=domains.domain_id }{$value}fail}} \
                                } \
                        } \
                 {yes}{no} \
               }
  local_part_suffix = -*
  local_part_suffix_optional
  retry_use_local_part
These transporters will move spam between user's tag score and 9 to the folder Filter-Spam-Low (will be auto-generated), and spam between 9 and user's refuse score to folder Filter-Spam-High, but only if the user has turned on the setting via Vexim. - The two routers use a custom transporter, add this to the transporters section of your Exim configuration file:
axel_move_folder_transport:
  driver = appendfile
  envelope_to_add
  return_path_add
  mode = 0600
  maildir_format = true
  create_directory = true
  transport_filter = '${if or { {eq {0}{${lookup mysql{select on_spamassassin from users,domains \
                                        where localpart = "${quote_mysql:$local_part}" \
                                        and domain = "${quote_mysql:$domain}" \
                                        and users.domain_id=domains.domain_id}{$value}}}} \
                                {< {$spam_score_int}{${lookup mysql{select users.sa_tag * 10 from users,domains \
                                        where localpart = "${quote_mysql:$local_part}" \
                                        and domain = "${quote_mysql:$domain}" \
                                        and users.domain_id=domains.domain_id \
                                        and on_spamassassin = 1}{$value}}}} \
                                } {/bin/cat}{/usr/local/etc/exim/rewrite_subject.pl}}'
  user = ${lookup mysql{select users.uid  from users,domains \
                where localpart = '${quote_mysql:$local_part}' \
                and domain = '${quote_mysql:$domain}' \
                and users.domain_id = domains.domain_id}}
  group = ${lookup mysql{select users.gid from users,domains \
                where localpart = '${quote_mysql:$local_part}' \
                and domain = '${quote_mysql:$domain}' \
                and users.domain_id = domains.domain_id}}
As you see, this transporter uses the perl script from chapter 2 to add "*****SPAM*****" to subject of tagged mail. If you don't want to use this script, just remove the transport_filter setting. - Now we need to edit the Vexim PHP files so that new passwords isn't written to the database in clear text. You can either:
- Download a compressed file with all the affected files (last uptdated 2009-09-25), and replace your Vexim folder with these files. Note that these new files also include the crypted password hack from chapter 1 and a note about to the parse cript in chapter 5. Thus you need to follow at least chapter 1 and 5 as well to get a working Vexim with this zip-file.
- If you have done your own Vexim tweaks that you don't want to override, or you just need more control of the process, you can do the required changes manually instead.
- We've now added the required MySQL field, the Exim transporter, and the Vexim configuration field. Voila!
5. Shell script that does some mail parsing
This shell script will go through all mail folders and look for some special folders:
- Mail in any folders named LearnAsSpam or LearnAsHam will be sent to SpamAsassin for learning, and will then be deleted.
- Mail in folders Filter-Spam-Low being older than 90 days will be deleted, in Filter-Spam-High older than 30 days.
Setting up the script and automating it with a nightly cron is done like this:
- Make the file /usr/local/etc/exim/spam-parse.sh with the following contents:
#!/bin/sh

# ---------- START ---------- sa-learn in standard folders ----------

learn="/usr/local/bin/sa-learn"
SpamLearnDirs=`find /usr/local/mail/ -name "*LearnAsSpam" -type d`
HamLearnDirs=`find /usr/local/mail/ -name "*LearnAsHam" -type d`

for spamdir in $SpamLearnDirs; do
$learn --spam $spamdir/cur
$learn --spam $spamdir/new
rm -f $spamdir/cur/*
rm -f $spamdir/new/*
done

for hamdir in $HamLearnDirs; do
$learn --ham $hamdir/cur
$learn --ham $hamdir/new
rm -f $hamdir/cur/*
rm -f $hamdir/new/*
done

# ----------  END  ---------- sa-learn in standard folders ----------

# ---------- START ---------- delete old mail in auto filter folders ----------

FilterSpamLowDirs=`find /usr/local/mail/ -name "*Filter-Spam-Low*" -type d`
FilterSpamHighDirs=`find /usr/local/mail/ -name "*Filter-Spam-High*" -type d`

for filterspamlowdir in $FilterSpamLowDirs; do
find $filterspamlowdir/cur -type f -ctime +90 | xargs rm
find $filterspamlowdir/new -type f -ctime +90 | xargs rm
done

for filterspamhighdir in $FilterSpamHighDirs; do
find $filterspamhighdir/cur -type f -ctime +30 | xargs rm
find $filterspamhighdir/new -type f -ctime +30 | xargs rm
done

# ----------  END  ---------- delete old mail in auto filter folders ----------
If you have your mail saved in another location than the default location, or the sa-learn binary is not placed in the directory in the code above, you will need to edit the code. - Make the shell script executeable:
chmod 755 /usr/local/etc/exim/parse-spam.sh
- Check that the script is working as expected by running it from prompt:
/usr/local/etc/exim/parse-spam.sh
- If everything looks good, go into root's crontab with the following command:
crontab -e
- Add the following line to run the script every midnight:
0 0 * * * /usr/local/etc/exim/spam-parse.sh >/var/log/spam-parse.log 2>&1
- If you want to set up automatic log rotation for the logfile, add this line to your /etc/newsyslog.conf:
/var/log/spam-parse-delete-old.log 600 7 100 * J
- You now have a functioning parse script!
6. Roundcube plugin for editing Vexim user settings

I've been happy using Horde IMP as the webmail system for a long time, but recently changed to Roundcube as it provides a more sleek user experience thanks to the extensive use of AJAX technology.
I have made a plugin for Roundcube that moves all user configuration options in Vexim into the webmail. You will still need Vexim to administrate domains, but for regular users, there is no need to log in to Vexim. With this plugin they can change password, spam and virus settings, autoresponder, forwarding and header rules. The plugin can be used with a standard Vexim installation, and if you choose to add one or more of the customizations in chapter 1 to 5 on this page, you can enable support for these as well in the plugin configuration. The plugin is installed like this:
- You need a working Roundcube 0.3 (+) installation. See the official Roundcube installation howto if you have not yet installed Roundcube.
- As a starting note: To get proper support for quota status in Roundcube, you should ipdate your exim configuration (/usr/local/etc/exim/configure). In the virtual_delivery transport, you should set maildir_use_size_file to true.
You should also open the Courier-authlib MySQL authentication file (/usr/local/etc/authlib/authmysqlrc) and make sure that you have a line MYSQL_QUOTA_FIELD like this:MYSQL_QUOTA_FIELD quota
- Download the plugin from this page and uncompress it to the Roundcube plugins/ folder.
- Enable the plugin by adding it to the Roundcube configuration file. Example:
$rcmail_config['plugins'] = array("veximaccountadmin", "otherplugin") - Copy config.inc.php.dist to config.inc.php in the plugin folder. It is recommended to keep the dist file. You should make sure config.inc.php is not public-readable, as it will contain the password to your Vexim database.
- Open config.inc.php and do the following:
- Add your Vexim database info.
- Check that you use the same $cryptscheme as in Vexim configuration.
- If you use some of the customizations mentioned previously on this page, you should add support for them by setting the appropiate variable to true.
- Check that the Vexim URL is correct if you want to provide a Vexim link to admin users.
- Vexim-like administration from inside Roundcube webmail should now be working. You may also like the ServerInfo plugin, which I wrote for my server.
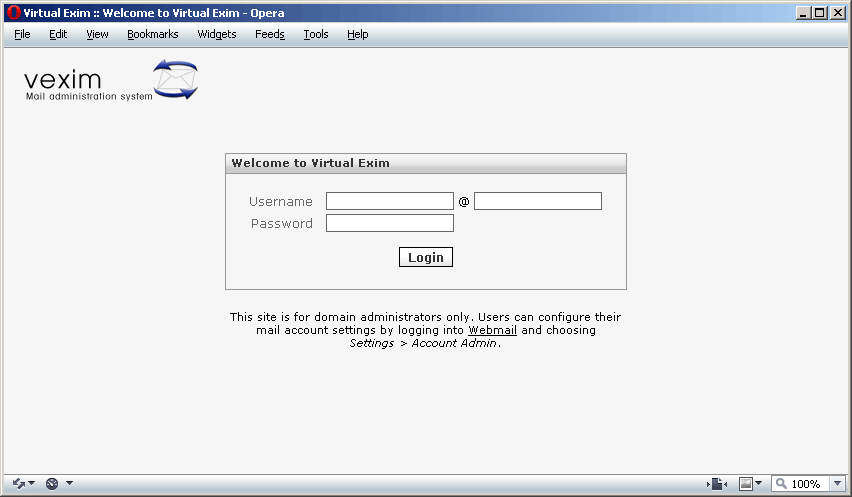
Since you are using Roundcube for webmail, you can change your Vexim login page to a Roundcube-like design (see screenshot on the right) for a cleaner user experience. The modification is only visual, and only regards the login page. The screenshot shows an installation with textbox as domain setting, but the modification also works with the dropdown or static setting.
Just download vexim-2.2.1-login_roundcube_style.tar.gz and uncompress it to your Vexim folder to freshen up the login page .
Conclution
I hope you found this information useful. If you have any questions, don't hesitate to ask.
Please consider making a donation if this page made your life a little bit happier, that would be greatly appreciated and motivate a poor student to continue this project.
I appreciate all feedback/questions/comment/general rant - please leave a comment below! :)
Comments (9)
Update 6 January 2015: Because this site is no longer maintained, and have been converted to a static site, it is not possible to post new comments or use the search function. Sorry!
Only registered users can write comments!
-
|2010-05-19 13:01:14 Michael - Vexim domain creation bugThere seems to be a problem with clear passwords when the siteadmin creates a domain. It does not write the passwords encrypted in the database. The CLEAR text field is still readable. You then have to logout after creating the domain and login as the domain admin. Then, if you enter the password again and save it then and only then does it encrypt the CLEAR text field.
Did anyone notice this or is this project dead?
-
|2011-02-05 05:23:39 Oliver - cleartext passwordsHiya, I followed the "manual mod instructions" and indeed several php files still write the clear password. Just do a grep for "clear=" on all *.php files and modify them according to the given instructions (there are 3 or 4 more files to edit).
1. Move this to the top each SQL statement block: $cryptedpassword = crypt_password($_POST['clear'], $salt);
2. Replace the strings behind clear= and crypt= by '{$cryptedpassword}'
Works fine now.
-
|2010-05-19 01:53:26 Michael - users.axel_on_filtermove is missingI think this table is missing. At least i dont see any mention of it above. Im getting the following error.
MYSQL: query failed: Unknown column 'users.axel_on_filtermove' in 'where clause' in my logs.
Can you update your docs?
-
|2010-02-27 01:04:04 Sam - Fantastic - good jobJust found this page and your post about your pluging. Have been using Vexim as the main interface to our email system - for the past two.5 years. And also Roundcube for the last 18 months. Havent tried your plugin yet - but hugely excited by the prospect. It looks / sounds great. cheers - good work.
-
|2009-11-21 21:06:05 Chuck - Need just a wee bit more.Could use a whitelist/blacklist by email feature for individual users. :)
I know, it's a pain... but i'm told i have to put this in and i don't want to reinvent the wheel.
-
|2009-11-21 23:47:47 Axel Sjøstedt - AgreeYep, I think many would welcome a decent blacklist/whitelist functionality in Vexim! Much more useful than today's limited header blocks...
I have no plans on implementing it though. Please contact me if you do it and want to put it on this page :)
-
|2009-10-14 14:11:17 Stefan - Double // before veximaaccountadmin ion error logSorry and thanx form previously post. I'm Blindman -) I'ts OK, but i have error:
[14-Oct-2009 15:02:28 +0200]: PHP Error: Failed to load config from /home/www/rc3/plugins//veximaccountadmin/config.inc.php (GET /rc3/?_task=settings&_action=plugin.veximaccountadmin)
It is Ok ? - double // before veximaaccountadmin ?
Powered by !JoomlaComment 4.0 beta2